Difference between revisions of "Modded Furniture"
Jump to navigation
Jump to search
Sgt Hebert (talk | contribs) |
|||
| Line 44: | Line 44: | ||
|- | |- | ||
|Aloe Vera | |Aloe Vera | ||
| − | | | + | |[[File:Neo Sprite.png]][[File:CGSeller Sprite.png]][[File:Calluna Sprite.png]] |
| - | | - | ||
|Bought from the [[Shops#Garden Centre|Garden Centre]] - 150 sil | |Bought from the [[Shops#Garden Centre|Garden Centre]] - 150 sil | ||
|- | |- | ||
|Begonia | |Begonia | ||
| − | | | + | |[[File:Neo Sprite.png]][[File:Calluna Sprite.png]] |
| - | | - | ||
|Bought from the [[Shops#Garden Centre|Garden Centre]] - 150 sil | |Bought from the [[Shops#Garden Centre|Garden Centre]] - 150 sil | ||
|- | |- | ||
|Bonsai | |Bonsai | ||
| − | | | + | |[[File:Neo Sprite.png]][[File:Calluna Sprite.png]] |
| - | | - | ||
|Bought from the [[Shops#Garden Centre|Garden Centre]] - 150 sil | |Bought from the [[Shops#Garden Centre|Garden Centre]] - 150 sil | ||
|- | |- | ||
|Cactus | |Cactus | ||
| − | | | + | |[[File:Neo Sprite.png]][[File:CGSeller Sprite.png]][[File:Calluna Sprite.png]] |
| - | | - | ||
|Bought from the [[Shops#Garden Centre|Garden Centre]] - 150 sil | |Bought from the [[Shops#Garden Centre|Garden Centre]] - 150 sil | ||
|- | |- | ||
|Dracaena | |Dracaena | ||
| − | | | + | |[[File:Neo Sprite.png]][[File:Calluna Sprite.png]] |
| - | | - | ||
|Bought from the [[Shops#Garden Centre|Garden Centre]] - 500 sil | |Bought from the [[Shops#Garden Centre|Garden Centre]] - 500 sil | ||
|- | |- | ||
|Monster Deliciosa | |Monster Deliciosa | ||
| − | | | + | |[[File:Neo Sprite.png]][[File:Calluna Sprite.png]] |
| - | | - | ||
|Bought from the [[Shops#Garden Centre|Garden Centre]] - 500 sil | |Bought from the [[Shops#Garden Centre|Garden Centre]] - 500 sil | ||
|- | |- | ||
|Palm Tree | |Palm Tree | ||
| − | | | + | |[[File:Neo Sprite.png]] |
| - | | - | ||
|Bought from the [[Shops#Garden Centre|Garden Centre]] - 500 sil | |Bought from the [[Shops#Garden Centre|Garden Centre]] - 500 sil | ||
|- | |- | ||
|Schefflera | |Schefflera | ||
| − | | | + | |[[File:Neo Sprite.png]] |
| - | | - | ||
|Bought from the [[Shops#Garden Centre|Garden Centre]] - 500 sil | |Bought from the [[Shops#Garden Centre|Garden Centre]] - 500 sil | ||
| Line 112: | Line 112: | ||
|- | |- | ||
|Lady Statue | |Lady Statue | ||
| − | | | + | |[[File:Neo Sprite.png]][[File:Melfi Sprite.png]][[File:Doralice Sprite.png]][[File:WinterNymph Sprite.png]] |
| - | | - | ||
|Bought from the [[Shops#Sculptor|Sculptor]] - 1000 sil | |Bought from the [[Shops#Sculptor|Sculptor]] - 1000 sil | ||
| Line 150: | Line 150: | ||
|- | |- | ||
|Landscape Picture | |Landscape Picture | ||
| − | | | + | |[[File:Neo Sprite.png]][[File:RainaSMom Sprite.png]][[File:Silvayuco Sprite.png]][[File:Doralice Sprite.png]] |
| - | | - | ||
|Found in the [[ Eastfort Condo]], painted by [[Quinta]] | |Found in the [[ Eastfort Condo]], painted by [[Quinta]] | ||
| Line 176: | Line 176: | ||
|- | |- | ||
|Trophy 1 | |Trophy 1 | ||
| − | | | + | |[[File:Neo Sprite.png]][[File:RainaSMom Sprite.png]][[File:Lola Sprite.png]] |
| - | | - | ||
|Awarded for completing [[Other Quests#Tournament Fighter|Tournament Fighter]] | |Awarded for completing [[Other Quests#Tournament Fighter|Tournament Fighter]] | ||
|- | |- | ||
|Trophy 2 | |Trophy 2 | ||
| − | | | + | |[[File:Neo Sprite.png]][[File:RainaSMom Sprite.png]][[File:Lola Sprite.png]] |
| - | | - | ||
|Awarded for completing [[Other Quests#Tournament Fighter 2|Tournament Fighter 2]] | |Awarded for completing [[Other Quests#Tournament Fighter 2|Tournament Fighter 2]] | ||
|- | |- | ||
|Trophy 3 | |Trophy 3 | ||
| − | | | + | |[[File:Neo Sprite.png]][[File:RainaSMom Sprite.png]][[File:Lola Sprite.png]] |
| - | | - | ||
|Awarded for completing [[Other Quests#Super Tournament Fighter II|Super Tournament Fighter II]] | |Awarded for completing [[Other Quests#Super Tournament Fighter II|Super Tournament Fighter II]] | ||
|- | |- | ||
|Trophy 4 | |Trophy 4 | ||
| − | | | + | |[[File:Neo Sprite.png]][[File:RainaSMom Sprite.png]][[File:Lola Sprite.png]] |
| | | | ||
|Awarded for completing [[Other Quests#Super Tournament Fighter II Turbo|Super Tournament Fighter II Turbo]] | |Awarded for completing [[Other Quests#Super Tournament Fighter II Turbo|Super Tournament Fighter II Turbo]] | ||
| Line 204: | Line 204: | ||
|- | |- | ||
|Piano | |Piano | ||
| − | | | + | |[[File:Neo Sprite.png]][[File:Doralice Sprite.png]][[File:Mitzi Sprite.png]] |
| - | | - | ||
|Take from Hero's old home in [[Character Quests#Family Matters|Family Matters]] | |Take from Hero's old home in [[Character Quests#Family Matters|Family Matters]] | ||
| Line 210: | Line 210: | ||
|Dragon Head | |Dragon Head | ||
|[[File:Melfi Sprite.png]][[File:CGSeller Sprite.png]] | |[[File:Melfi Sprite.png]][[File:CGSeller Sprite.png]] | ||
| − | | | + | |[[File:Neo Sprite.png]][[File:WinterNymph Sprite.png]] |
|Complete [[Character Quests#Family Matters|Family Matters]] | |Complete [[Character Quests#Family Matters|Family Matters]] | ||
|- | |- | ||
| Line 256: | Line 256: | ||
|- | |- | ||
|[[Chimei]] Portrait | |[[Chimei]] Portrait | ||
| − | | | + | |[[File:Neo Sprite.png]] |
| - | | - | ||
|- | |- | ||
| Line 296: | Line 296: | ||
|- | |- | ||
|[[Natya]] Portrait | |[[Natya]] Portrait | ||
| − | | | + | |[[File:Neo Sprite.png]][[File:Doralice Sprite.png]] |
| - | | - | ||
|- | |- | ||
| Line 308: | Line 308: | ||
|- | |- | ||
|[[Quinta]] Portrait | |[[Quinta]] Portrait | ||
| − | | | + | |[[File:Neo Sprite.png]][[File:RainaSMom Sprite.png]][[File:Melfi Sprite.png]][[File:Doralice Sprite.png]] |
| - | | - | ||
|- | |- | ||
| Line 337: | Line 337: | ||
! style="width:15%" |Hate | ! style="width:15%" |Hate | ||
|- | |- | ||
| − | |<span style="color:#FF6060">Neo</span>poli<span style="color:#803216">tan</span> Portrait | + | |[[Neopolitan|<span style="color:#FF6060">Neo</span>poli<span style="color:#803216">tan</span>]] Portrait |
| − | |[[File:Alina Sprite.png]][[File:Chimei Sprite.png]][[File:Quinta Sprite.png]][[File:Natya Sprite.png]] | + | |[[File:Alina Sprite.png]][[File:Chimei Sprite.png]][[File:Quinta Sprite.png]][[File:Natya Sprite.png]][[File:Neo Sprite.png]][[File:Vanille Sprite.png]][[File:Fragalia Sprite.png]][[File:Chocolat Sprite.png]] |
| - | | - | ||
| - | | - | ||
| Line 444: | Line 444: | ||
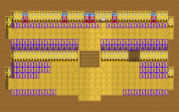
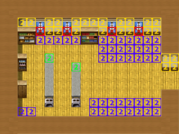
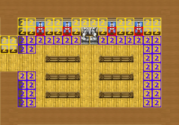
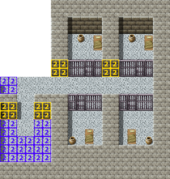
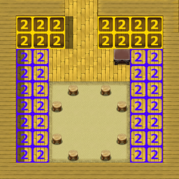
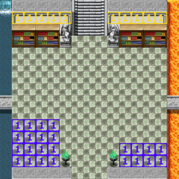
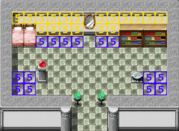
|<div style="float:right;">[[File:Northmarket Manor - Front Hall.png|179x179px]]</div> | |<div style="float:right;">[[File:Northmarket Manor - Front Hall.png|179x179px]]</div> | ||
|Front Hall | |Front Hall | ||
| − | | | + | |[[File:Neo Sprite.png]][[File:RainaSMom Sprite.png]][[File:Silvayuco Sprite.png]][[File:Melfi Sprite.png]][[File:Doralice Sprite.png]][[File:Shally Sprite.png]][[File:Calluna Sprite.png]][[File:Mitzi Sprite.png]] |
|[[File:CGSeller Sprite.png]] | |[[File:CGSeller Sprite.png]] | ||
|} | |} | ||
| Line 456: | Line 456: | ||
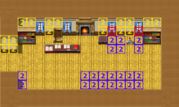
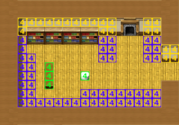
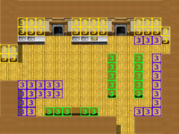
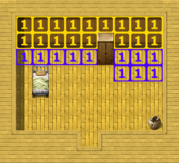
|<div style="float:right;">[[File:Northmarket Manor - East Wing 2F Hallway.png|179x179px]]</div> | |<div style="float:right;">[[File:Northmarket Manor - East Wing 2F Hallway.png|179x179px]]</div> | ||
|Hallway | |Hallway | ||
| − | | | + | |[[File:Neo Sprite.png]] |
| - | | - | ||
|- | |- | ||
| Line 476: | Line 476: | ||
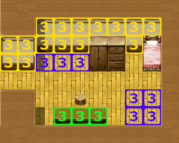
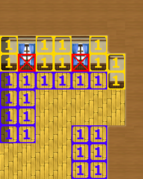
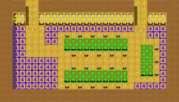
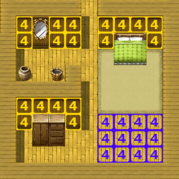
|<div style="float:right;">[[File:Northmarket Manor - East Wing 2F Master Bedroom.png|179x179px]]</div> | |<div style="float:right;">[[File:Northmarket Manor - East Wing 2F Master Bedroom.png|179x179px]]</div> | ||
|Master Bedroom | |Master Bedroom | ||
| − | | | + | |[[File:Neo Sprite.png]] |
| - | | - | ||
|} | |} | ||
| Line 498: | Line 498: | ||
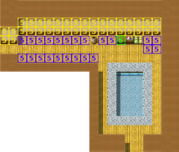
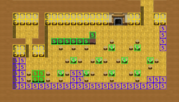
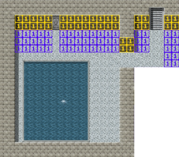
|<div style="float:right;">[[File:Northmarket Manor - West Wing 2F Hallway.png|179x179px]]</div> | |<div style="float:right;">[[File:Northmarket Manor - West Wing 2F Hallway.png|179x179px]]</div> | ||
|Hallway | |Hallway | ||
| − | | | + | |[[File:Neo Sprite.png]][[File:Amiri Sprite.png]][[File:Melfi Sprite.png]][[File:Doralice Sprite.png]][[File:Shally Sprite.png]][[File:Evanie Sprite.png]][[File:Fiona Sprite.png]] |
| - | | - | ||
|- | |- | ||
| Line 509: | Line 509: | ||
|Personal Tavern | |Personal Tavern | ||
|[[File:CGSeller Sprite.png]] | |[[File:CGSeller Sprite.png]] | ||
| − | | | + | |[[File:Neo Sprite.png]][[File:Melfi Sprite.png]][[File:Doralice Sprite.png]][[File:Shally Sprite.png]][[File:Evanie Sprite.png]][[File:Fiona Sprite.png]] |
|} | |} | ||
| Line 520: | Line 520: | ||
|<div style="float:right;">[[File:Northmarket Manor - East Wing 1F Hallway.png|179x179px]]</div> | |<div style="float:right;">[[File:Northmarket Manor - East Wing 1F Hallway.png|179x179px]]</div> | ||
|Hallway | |Hallway | ||
| − | | | + | |[[File:Neo Sprite.png]][[File:RainaSMom Sprite.png]][[File:Silvayuco Sprite.png]][[File:Melfi Sprite.png]][[File:Doralice Sprite.png]][[File:Shally Sprite.png]][[File:Calluna Sprite.png]] |
| - | | - | ||
|- | |- | ||
| Line 535: | Line 535: | ||
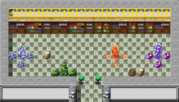
|<div style="float:right;">[[File:Northmarket Manor - East Wing 1F Dining Room.png|179x179px]]</div> | |<div style="float:right;">[[File:Northmarket Manor - East Wing 1F Dining Room.png|179x179px]]</div> | ||
|Dining Room | |Dining Room | ||
| − | | | + | |[[File:Neo Sprite.png]][[File:RainaSMom Sprite.png]][[File:Calluna Sprite.png]] |
|[[File:Silvayuco Sprite.png]][[File:Vanille Sprite.png]][[File:Fragalia Sprite.png]][[File:Chocolat Sprite.png]] | |[[File:Silvayuco Sprite.png]][[File:Vanille Sprite.png]][[File:Fragalia Sprite.png]][[File:Chocolat Sprite.png]] | ||
|} | |} | ||
| Line 597: | Line 597: | ||
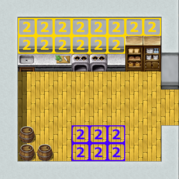
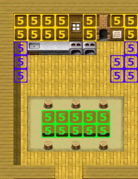
|<div style="float:right;">[[File:Eastfort Condo - First Floor Kitchen.png|179x179px]]</div> | |<div style="float:right;">[[File:Eastfort Condo - First Floor Kitchen.png|179x179px]]</div> | ||
|Kitchen | |Kitchen | ||
| − | | | + | |[[File:Neo Sprite.png]] |
| - | | - | ||
|- | |- | ||
|<div style="float:right;">[[File:Eastfort Condo - First Floor Foyer.png|179x179px]]</div> | |<div style="float:right;">[[File:Eastfort Condo - First Floor Foyer.png|179x179px]]</div> | ||
|Foyer | |Foyer | ||
| − | | | + | |[[File:Neo Sprite.png]] |
| - | | - | ||
|- | |- | ||
| Line 613: | Line 613: | ||
|Dining Area | |Dining Area | ||
| - | | - | ||
| − | | | + | |[[File:Neo Sprite.png]] |
|} | |} | ||
| Line 669: | Line 669: | ||
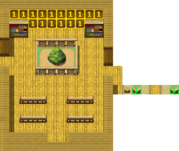
|<div style="float:right;">[[File:Westcastle Manor - First Floor Kitchen .png|179x179px]]</div> | |<div style="float:right;">[[File:Westcastle Manor - First Floor Kitchen .png|179x179px]]</div> | ||
|Kitchen | |Kitchen | ||
| − | | | + | |[[File:Neo Sprite.png]][[File:Lola Sprite.png]][[File:CGSeller Sprite.png]] |
| - | | - | ||
|- | |- | ||
| Line 684: | Line 684: | ||
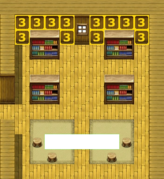
|<div style="float:right;">[[File:Westcastle Manor - First Floor Study Room.png|179x179px]]</div> | |<div style="float:right;">[[File:Westcastle Manor - First Floor Study Room.png|179x179px]]</div> | ||
|Study Room | |Study Room | ||
| − | | | + | |[[File:Neo Sprite.png]] |
| - | | - | ||
|- | |- | ||
| Line 690: | Line 690: | ||
|Ballroom | |Ballroom | ||
| - | | - | ||
| − | | | + | |[[File:Neo Sprite.png]][[File:Evanie Sprite.png]][[File:Fiona Sprite.png]][[File:Lola Sprite.png]] |
|} | |} | ||
| Line 711: | Line 711: | ||
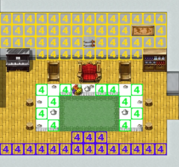
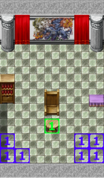
|<div style="float:right;">[[File:Westcastle Manor - Second Floor Main Hall.png|179x179px]]</div> | |<div style="float:right;">[[File:Westcastle Manor - Second Floor Main Hall.png|179x179px]]</div> | ||
|Main Hall | |Main Hall | ||
| − | | | + | |[[File:Neo Sprite.png]] |
| - | | - | ||
|- | |- | ||
|<div style="float:right;">[[File:Westcastle Manor - Second Floor Master Bedroom.png|179x179px]]</div> | |<div style="float:right;">[[File:Westcastle Manor - Second Floor Master Bedroom.png|179x179px]]</div> | ||
|Master Bedroom | |Master Bedroom | ||
| − | | | + | |[[File:Neo Sprite.png]] |
| - | | - | ||
|- | |- | ||
|<div style="float:right;">[[File:Westcastle Manor - Second Floor Right Hallway.png|179x179px]]</div> | |<div style="float:right;">[[File:Westcastle Manor - Second Floor Right Hallway.png|179x179px]]</div> | ||
|Right Hallway | |Right Hallway | ||
| − | | | + | |[[File:Neo Sprite.png]] |
| - | | - | ||
|} | |} | ||
| Line 734: | Line 734: | ||
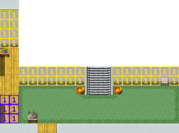
|<div style="float:right;">[[File:Elf Shrine - Meditation Room.png|179x179px]]</div> | |<div style="float:right;">[[File:Elf Shrine - Meditation Room.png|179x179px]]</div> | ||
|Meditation Room | |Meditation Room | ||
| − | | | + | |[[File:Neo Sprite.png]] |
| - | | - | ||
|- | |- | ||
| Line 755: | Line 755: | ||
|Remodelled Bedroom | |Remodelled Bedroom | ||
| - | | - | ||
| − | | | + | |[[File:Neo Sprite.png]] |
|} | |} | ||
| Line 767: | Line 767: | ||
|<div style="float:right;">[[File:Southport Manor - University Dorms.png|179x179px]]</div> | |<div style="float:right;">[[File:Southport Manor - University Dorms.png|179x179px]]</div> | ||
|University Dorms | |University Dorms | ||
| − | | | + | |[[File:Neo Sprite.png]][[File:Silvayuco Sprite.png]][[File:Amiri Sprite.png]][[File:WinterNymph Sprite.png]][[File:CGSeller Sprite.png]] |
| - | | - | ||
|} | |} | ||
| Line 779: | Line 779: | ||
|<div style="float:right;">[[File:Southport Manor - True Southport Manor Room 1.png|179x179px]]</div> | |<div style="float:right;">[[File:Southport Manor - True Southport Manor Room 1.png|179x179px]]</div> | ||
|Room 1 | |Room 1 | ||
| − | | | + | |[[File:Neo Sprite.png]][[File:Silvayuco Sprite.png]][[File:Amiri Sprite.png]][[File:WinterNymph Sprite.png]][[File:CGSeller Sprite.png]] |
| - | | - | ||
|- | |- | ||
| Line 801: | Line 801: | ||
|<div style="float:right;">[[File:Southport Manor - Slave Quarters Room 1.png|179x179px]]</div> | |<div style="float:right;">[[File:Southport Manor - Slave Quarters Room 1.png|179x179px]]</div> | ||
|Room 1 | |Room 1 | ||
| − | | | + | |[[File:Neo Sprite.png]][[File:WinterNymph Sprite.png]] |
| - | | - | ||
|- | |- | ||
|<div style="float:right;">[[File:Southport Manor - Slave Quarters Room 2.png|179x179px]]</div> | |<div style="float:right;">[[File:Southport Manor - Slave Quarters Room 2.png|179x179px]]</div> | ||
|Room 2 | |Room 2 | ||
| − | | | + | |[[File:Neo Sprite.png]][[File:WinterNymph Sprite.png]] |
| - | | - | ||
|- | |- | ||
|<div style="float:right;">[[File:Southport Manor - Slave Quarters Room 3.png|179x179px]]</div> | |<div style="float:right;">[[File:Southport Manor - Slave Quarters Room 3.png|179x179px]]</div> | ||
|Room 3 | |Room 3 | ||
| − | | | + | |[[File:Neo Sprite.png]] |
| - | | - | ||
|- | |- | ||
| Line 834: | Line 834: | ||
|Room 1 | |Room 1 | ||
| - | | - | ||
| − | | | + | |[[File:Neo Sprite.png]] |
|- | |- | ||
|<div style="float:right;">[[File:Southport Manor - Slave Quarters Continued Room 2.png|179x179px]]</div> | |<div style="float:right;">[[File:Southport Manor - Slave Quarters Continued Room 2.png|179x179px]]</div> | ||
|Room 2 | |Room 2 | ||
| − | | | + | |[[File:Neo Sprite.png]] |
| - | | - | ||
|- | |- | ||
|<div style="float:right;">[[File:Southport Manor - Slave Quarters Continued Room 3.png|179x179px]]</div> | |<div style="float:right;">[[File:Southport Manor - Slave Quarters Continued Room 3.png|179x179px]]</div> | ||
|Room 3 | |Room 3 | ||
| − | | | + | |[[File:Neo Sprite.png]] |
| - | | - | ||
|} | |} | ||
Revision as of 04:23, 3 May 2021
This guide assume your are already familiar with the furniture system.
Contents
Furniture
Modded Character Preference
Military
| Item | Like | Hate | Acquired |
|---|---|---|---|
| Sword Stand | - | Bought from Westcastle Blacksmith - 750 sil | |
| Decorative Spears | - | - | Bought from Westcastle Blacksmith - 750 sil |
| Decorative Shield | - | - | Bought from Westcastle Blacksmith - 644 sil |
| Armour Stand | - | - | Found in the Eastfort Condo |
| Decorative Axes | - | - | Bought from Westcastle Blacksmith - 650 sil |
Plants
| Item | Like | Hate | Acquired |
|---|---|---|---|
| Aloe Vera | - | Bought from the Garden Centre - 150 sil | |
| Begonia | - | Bought from the Garden Centre - 150 sil | |
| Bonsai | - | Bought from the Garden Centre - 150 sil | |
| Cactus | - | Bought from the Garden Centre - 150 sil | |
| Dracaena | - | Bought from the Garden Centre - 500 sil | |
| Monster Deliciosa | - | Bought from the Garden Centre - 500 sil | |
| Palm Tree | - | Bought from the Garden Centre - 500 sil | |
| Schefflera | - | Bought from the Garden Centre - 500 sil |
Statues
| Item | Like | Hate | Acquired |
|---|---|---|---|
| Fairy Statue | - | Bought from the Sculptor - 1000 sil | |
| Angel Statue | - | Bought from the Sculptor - 1000 sil | |
| Small Dragon Statue | - | Bought from the Sculptor - 1000 sil | |
| Large Dragon Statue | - | Bought from the Sculptor - 2000 sil | |
| Lady Statue | - | Bought from the Sculptor - 1000 sil | |
| Small Demon Statue | - | - | Bought from the Sculptor - 1000 sil |
| Large Demon Statue | - | - | Bought from the Sculptor - 2000 sil |
Misc.
| Item | Like | Hate | Acquired |
|---|---|---|---|
| Clock | - | Bought from the Eastfort Clock Shop - 500 sil | |
| Bearskin Rug | - | - | Bought from the Huntervale- Trader's Post - 2000 sil / Buried treasure in the Green Tower |
| Light and Mercy Banner | - | - | Bought from the Paladin's of Light and Mercy HQ -3500 sil |
| Landscape Picture | - | Found in the Eastfort Condo, painted by Quinta | |
| Keg of Ale | - | Bought from the Tin Dog Tavern - 650 sil | |
| Kellos Banner | - | Can be found during Whose Fort Is It Anyways? |
Story Furniture
These are furniture obtained as quest rewards
Tournament Awards
| Item | Love | Hate | Acquired |
|---|---|---|---|
| Trophy 1 | - | Awarded for completing Tournament Fighter | |
| Trophy 2 | - | Awarded for completing Tournament Fighter 2 | |
| Trophy 3 | - | Awarded for completing Super Tournament Fighter II | |
| Trophy 4 | Awarded for completing Super Tournament Fighter II Turbo |
Misc.
| Item | Love | Hate | Acquired |
|---|---|---|---|
| Piano | - | Take from Hero's old home in Family Matters | |
| Dragon Head | Complete Family Matters | ||
| Holy Diver Display | Forge the Fate Ender | ||
| Guild Banner | - | Reach Banneret Rank in the Adventurer's Guild | |
| Demon Throne | - | Complete Hell to Pay | |
| Prism | - | Can be found during Stranger Things |
Portraits
These are all acquired from Quinta as her LQ reward
| Item | Love | Hate |
|---|---|---|
| Clementine Portrait | - | |
| Bell Portrait | ||
| Bronwyn Portrait | - | |
| Chimei Portrait | - | |
| Doll Portrait | - | |
| Elaiya Portrait | - | |
| Florine Portrait | ||
| Gargan Portrait | - | |
| Kyrie Portrait | ||
| Larelle Portrait | ||
| Meiriona Portrait | ||
| Meline Portrait | - | |
| Miri Portrait | - | |
| Natya Portrait | - | |
| Nerys Portrait | ||
| Pandora Portrait | - | |
| Quinta Portrait | - | |
| Raina Portrait | - | |
| Therese Portrait | - | |
| Yeon Portrait | - | - |
Modded Furniture
These are the furniture added by mods.
Portraits
These are all acquired from Quinta as her LQ reward
| Item | Love | Like | Hate |
|---|---|---|---|
| Neopolitan Portrait | - | - | |
| Raina's Mom Portrait | - | ||
| Silvayuco Portrait | |||
| Amiri Portrait | |||
| Queen Melfi Portrait | |||
| Doralice Portrait | |||
| Winter Nymph Portrait | |||
| Shally Portrait | |||
| Evanie Portrait | |||
| Fiona Portrait | |||
| Lola Portrait | |||
| Vanille Portrait | - | - | |
| Fragalia Portrait | - | - | |
| Chocolat Portrait | - | - | |
| Cursed Grenade Seller Portrait | - | - | |
| Calluna Portrait | - | ||
| Mitzi Portrait |
Furniture Spots
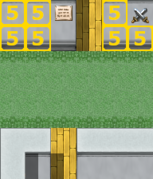
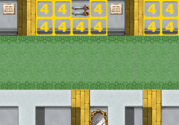
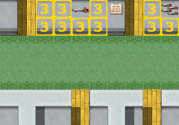
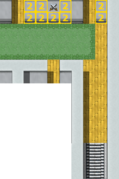
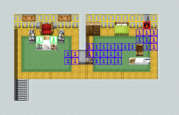
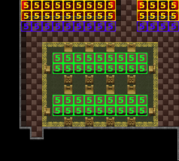
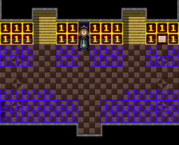
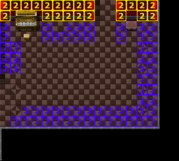
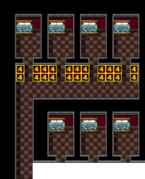
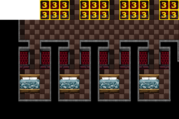
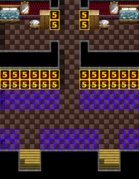
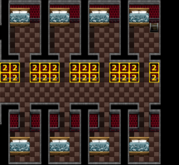
Furniture spots are divided into regions. In the following you will see what character think of those sections.
Image Legend:
![]() = Walls
= Walls
![]() = Floors
= Floors
![]() = Tables
= Tables
![]() = No air-space for floor items
= No air-space for floor items
Northmarket Manor
| Region | Front Hall | Like | Love |
|---|---|---|---|
| Front Hall |
| Region | East Wing 2F | Like | Love |
|---|---|---|---|
| Hallway | - | ||
| Study Room | - | - | |
| Indoor Bath | - | ||
| Alina's Bedroom | - | - | |
| Master Bedroom | - |
| Region | West Wing 2F | Like | Love |
|---|---|---|---|
| Magic Laboratory | - | ||
| Library | - | ||
| Hallway | - | ||
| Hallway(Room 3) | - | ||
| Personal Tavern |
| Region | East Wing 1F | Like | Love |
|---|---|---|---|
| Hallway | - | ||
| Chapel | - | ||
| Kitchen | |||
| Dining Room |
| Region | West Wing 1F | Like | Love |
|---|---|---|---|
| Main Hallway | - | - | |
| Main Hallway (Room 3) | - | - | |
| - | - | ||
| - | - | ||
| Third |
- | - |
| Region | Manor Basement | Like | Love |
|---|---|---|---|
| Cistern | - | ||
| Dungeon | - |
Eastfort Condo[1]
| Region | First Floor | Like | Love |
|---|---|---|---|
| Kitchen | - | ||
| Foyer | - | ||
| Balcony | - | - | |
| Dining Area | - |
| Region | Second Floor | Like | Love |
|---|---|---|---|
| Hallway | - | - | |
| Left Hall | - | - | |
| Left Middle Hall | - | - | |
| Right Middle Hall | - | - | |
| Right Hall | - | - |
| Region | Master Bedroom | Like | Love |
|---|---|---|---|
| Master Bedroom | - | - |
Westcastle Manor
| Region | First Floor | Like | Love |
|---|---|---|---|
| Kitchen | - | ||
| Dining Room | |||
| Foyer | - | ||
| Study Room | - | ||
| Ballroom | - |
| Region | Second Floor | Like | Love |
|---|---|---|---|
| Top Hallway | - | - | |
| Left Hallway | - | - | |
| Main Hall | - | ||
| Master Bedroom | - | ||
| Right Hallway | - |
Elf Shrine
| Region | Shrine Indoors | Like | Love |
|---|---|---|---|
| Meditation Room | - | ||
| Dining Room | - | - | |
| Central Hall | - | - | |
| Personal Library | - | - | |
| Remodelled Bedroom | - |
Southport Manor
| Region | University Dorms | Like | Love |
|---|---|---|---|
| University Dorms | - |
| Region | True Southport Manor | Like | Love |
|---|---|---|---|
| Room 1 | - | ||
| Room 2 | - | ||
| Room 3 | - |
| Region | Slave Quarters | Like | Love |
|---|---|---|---|
| Room 1 | - | ||
| Room 2 | - | ||
| Room 3 | - | ||
| Room 4 | - | ||
| Room 5 | - | - |
| Region | Slave Quarters Continued | Like | Love |
|---|---|---|---|
| Room 1 | - | ||
| Room 2 | - | ||
| Room 3 | - |
Using the data from NeopolitanV10.6 & HelpingHandV12.3
- ↑ The Eastfort Condo comes pre-equipped with 1 Clock, 2 Sword Stands, 2 Decorative Spears, 3 Decorative Shields, 2 Armour Stands, 1 Landscape Painting, and 3 Decorative Axes. These items can be cleared and placed in your other homes if so desired.
